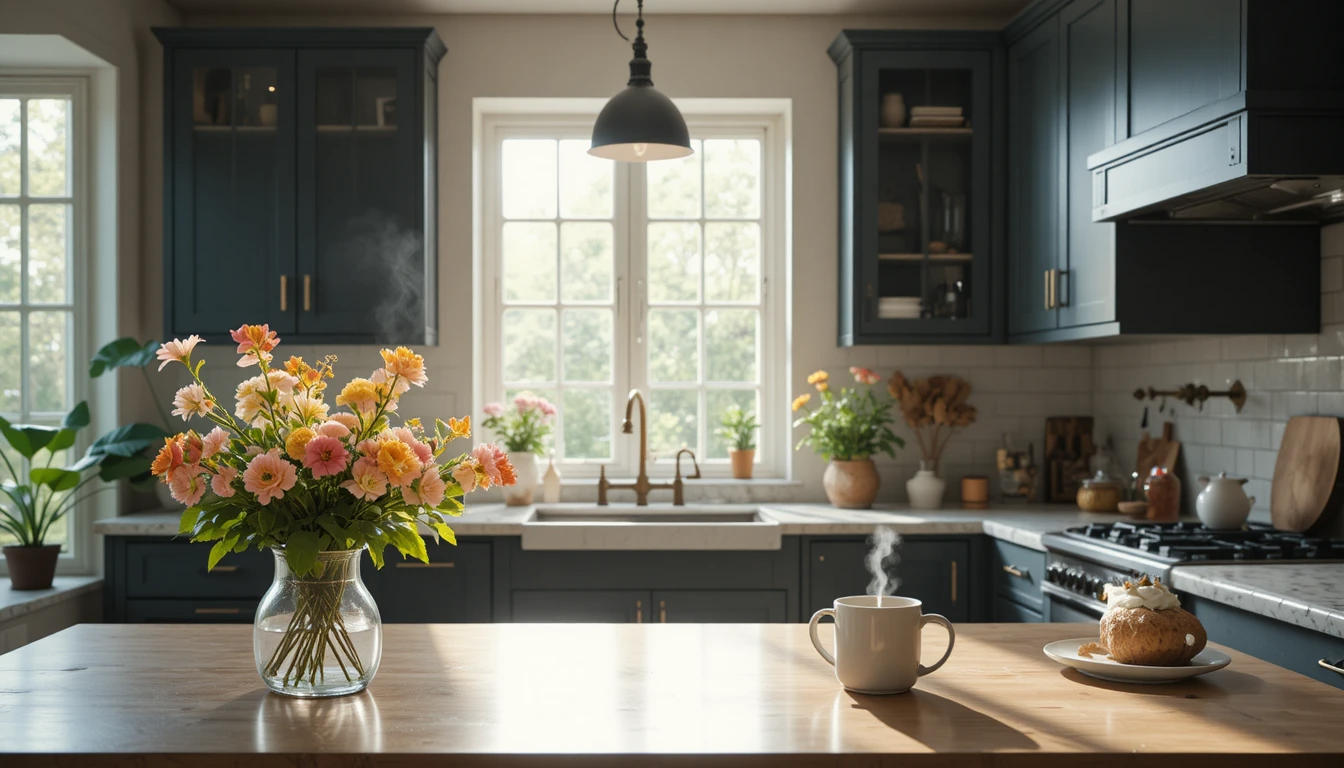

This glossary demystifies common fall terms you’ll meet while planning projects that prepare a house for colder months. It connects definitions to real tasks you can tackle this season and clarifies when to hire a pro.

Entries are alphabetized so you can find a definition, see why timing matters, and learn which tools or materials to use. Each item explains what to look for, what good performance looks like, and common mistakes to avoid.
The guide focuses on air sealing and insulation, HVAC maintenance, moisture control, exterior drainage, and safer tool use. It also shows cross-references—how weatherization and air sealing work together to amplify results.
Expect clear notes on cost, DIY-friendly steps, and when to call a contractor. Each entry estimates time and scope so you can bundle tasks before the first hard freeze. Later sections include a media glossary tied to the popular show and its series catchphrases for cultural context.
Key Takeaways
- Alphabetical entries link terms to real fall tasks and timing.
- Focus areas: air sealing, insulation, HVAC, moisture, and drainage.
- Each term lists checks, performance signs, and common errors.
- Guidance on DIY vs pro work, with time and cost cues.
- Bundle low-cost, high-impact tasks before the freeze for best results.
Glossary Overview: How to Use This Fall Home Improvement Dictionary
This glossary is built so you can jump to a term, read a quick use-it-this-season note, and decide what to do next.
Start each entry with the definition, skim the seasonal guidance, then follow the quick checklist to apply changes to your home. Use an episode-like workflow: diagnose the issue, plan materials, stage tools, execute the fix, and record results for the next season.

Quick wins matter. A single episode-sized task, such as installing a door sweep, can cut drafts and raise comfort quickly.
Bundle tasks for efficiency — air sealing before adding insulation avoids rework. Capture before/after photos and note R-values, product lines, and install dates.
- Symbol key: DIY difficulty, safety watchouts, early-season timing.
- Permits: check local codes before buying materials.
- Must-have tools: caulk gun, drill/driver, weatherstripping, utility knife.
| Task | DIY Level | Season Timing | Common Pitfall |
|---|---|---|---|
| Door sweep | Easy | Early fall | Wrong size/poor seal |
| Attic air sealing | Moderate | Mid fall | Skipping prep |
| Insulation add | Moderate | After sealing | Mismatched R-value |
home improvement
This section helps homeowners turn last season’s notes into a ranked list of fixes that yield the biggest comfort wins.

Definition and scope for homeowners
Planned upgrades, repairs, and routine maintenance protect the building envelope, boost comfort, and preserve value. Think air sealing, attic insulation tune-ups, HVAC service, and exterior drainage corrections.
Fall-focused projects and past-season lessons
Review past notes on drafts, ice dams, or uneven room temperatures. Prioritize fixes that cut heat loss at the attic hatch, rim joists, and utility penetrations before cosmetic work.
“Triage by impact: fix the biggest leaks first, then finish with trim and paint.”
- Annual cadence: schedule furnace service, gutter cleaning, and weatherstripping checks.
- Tools: use a smoke pencil or IR thermometer to find leaks fast.
- Cost-benefit: many steps are low-cost and DIY-friendly with one-season comfort returns.
Safety note: Always wear PPE, ensure ventilation, and follow tool instructions. Stage work like a small show—plan materials, order tasks, and reduce downtime.
Next: See the series sections that detail weatherization, air sealing, and insulation R-values.
Seasonal Fall Upgrade Essentials
Use this set of essentials to tackle high-impact fall tasks before the cold sets in. Focus on sealing, insulation, and system checks in a logical order to avoid rework.

Weatherization
Weatherization means sealing the building shell to cut stack-effect drafts as outdoor temperatures drop. Start at attic and rim joists, then move to doors and windows.
Air sealing
Seal attic penetrations, plumbing and electrical holes, and rim joists. Use latex or silicone caulk for gaps under 1/4″, and low-expansion spray foam (around 1.0 lb density) for irregular voids.
Insulation R-value
R-value shows resistance to heat flow. Top off attic insulation to recommended levels after sealing air leaks to keep insulation effective.
Furnace tune-up
Change filters, clean the blower, and run a combustion analysis. A pro’s instruments improve safety and ensure efficient power use.
Gutter guards & downspout extensions
- Gutter guards: mesh or solid types reduce clogs and help prevent ice dams.
- Downspouts: extend discharge 3–6 feet to keep water away from foundations before freeze/thaw cycles.
Door sweeps, storm windows, and thermostats
Measure and trim sweeps to close daylight gaps. Install storm windows for added insulation and vapor control—choose glass for durability or poly panels for temporary coverage.
Programmable thermostats follow fixed schedules; smart models add learning, remote sensors, and extra savings when placed away from drafts.
- Sequence: air seal first, then add insulation, tune the furnace, and finish with gutters and exterior drains.
Tools, “More Power,” and Safe Operation
Pick tools that match the task: the right driver, blade, and battery save time and reduce damage.

Drill/driver vs. impact driver
Drill/drivers are best for pilot holes, precise clutch settings, and clean starts with delicate trim. Use lower torque for finish screws.
Impact drivers deliver bursts of rotational force that drive long structural screws without stripping. Choose them for decking, framing screws, and stuck fasteners.
Oscillating multi-tool uses
The oscillating tool is a go-to for plunge cuts, trim undercuts, and grout removal. Pick bi-metal blades for metal and wood blades for clean framing cuts.
Maintain a straight cut line by marking the cut and working at low speed for control.
Torque, amperage, and battery platforms
Torque decides if a driver will seat a screw without stripping. Match higher torque to structural screws; use clutch settings near trim.
Amperage relates to runtime and sustained loads—higher amp-hour packs last longer on full-day jobs.
For batteries, 12V packs shine for light tasks and tight spaces. 18/20V platforms with brushless motors give sustained power for heavy fastening and longer runtime.
Safe operation checklist
- Wear eye and hearing protection and gloves.
- Inspect bits/blades for wear before use.
- Check collet or chuck tightness and secure batteries.
- Start at low speed; control feed to prevent cam-out or kick.
- Pre-mark cuts and drill pilot holes, especially in cold or brittle materials.
| Item | Use | Recommended Spec | Storage Tip |
|---|---|---|---|
| Drill/driver | Pilot holes, finish screws | Clutch, 12–18V | Store in case, cool dry place |
| Impact driver | Long screws, decking | High torque, brushless motor | Keep separate bit set labeled by screw type |
| Oscillating tool | Plunge cuts, trim work | Variable speed, blade selection | Organize blades by material in small cases |
| Battery packs | Power source | 12V / 18–20V, 2–5 Ah | Store at partial charge in cool spot for winter |
Basic fall set: drill/driver, impact, oscillating tool, blower/vac, caulk gun, utility knife, stapler, and a headlamp for attic time.
Label bit cases and group sets by material type. Use torque-limiting and pilot holes near trim or composites to prevent cracks. Charge and store batteries per maker advice to extend life through colder months.
Materials and Finishes for Autumn Projects
Select materials and finishes that hold up to cool, wet weather and make late-season installs simpler.

Exterior-grade caulk
Silicone sticks to glass and metal and stays flexible. It is not paintable, so use it on windows and glazing beads.
Polyurethane handles movement in expansion joints and bonds to porous substrates. Tool a neat bead by working quickly and keeping the tooling wet in cooler temps.
Weatherstripping and door seals
- Adhesive foam — quick fixes for small gaps.
- Kerf-in and V-strip — best for jambs with consistent reveals.
- Door sweeps and thresholds — choose by gap profile and door set geometry.
Paint, trim, and rot-resistant lumber
Use cold-weather paint systems with low minimum application temps and proper cure windows. Add bonding primer for slick or reclaimed boards to prevent peeling.
Composite trim resists moisture and needs wider fastener spacing and expansion gaps. For wood repairs, pick rot-resistant species and seal all cut ends before install.
| Product | Best Use | Cleanup |
|---|---|---|
| Silicone caulk | Glass, metal | Mineral spirits for tools |
| Polyurethane sealant | Expansion joints | Mineral spirits |
| Acrylic-latex | Paintable trim | Water cleanup |
Prep and storage tips: clean, dry, and dull surfaces; test adhesion on a small patch. Use backer rod for correct hourglass beads and stage materials indoors to hold temps within application ranges.
Labeling: record batch number, color code, and application date on containers to simplify future touch-ups and project tracking for home improvement records.
Planning, Permits, and Project Management
Start every project with a clear scope that lists goals, limits, and pass/fail acceptance checks. A tight scope keeps vendors aligned and helps you control cost and time.

Scope of work
Define objectives: list what will change, key measurements (door sizes, R-values), and finish standards.
Set constraints: note access limits, weather windows, and budget caps. Include alternates for long-lead items.
Permit vs. no-permit work
Typical permit triggers include structural changes, new electrical runs, gas connections, and major mechanical work. Minor repairs, trim, and most weatherstripping usually do not.
Verify requirements with local building departments before ordering materials or scheduling inspections.
Simple timeline and tools schedule
- Week 1: procure long-lead items and confirm permits.
- Week 2: rough work (air sealing, framing) with required inspections.
- Week 3: insulation, finish trades, and final checks.
Create a materials list that notes alternates and delivery lead times to avoid delays.
Risk, documentation, and communication
- Risk plan: mark tasks needing a second person, ladders, or shutoffs.
- Record-keeping: take before/after photos and note serial numbers for a useful series of maintenance records.
- Pro coordination: agree scope, schedule, and change-order rules in writing before work starts.
| Compliance Step | When | Who |
|---|---|---|
| Permit check | Before purchase | Owner / Contractor |
| Pre-install measurements | Before ordering | Owner |
| Final inspection & photos | After work | Inspector / Owner |
Build in contingency time for curing, inspections, and unexpected repairs. A short buffer avoids costly rush decisions and preserves quality.
Safety and Compliance Basics
Start every fall job with a short safety checklist to reduce risks and speed the work.

PPE and tool checks
Essential gear: cut‑resistant gloves, safety glasses, hearing protection, and task‑matched respirators. Use cut gloves for trim and insulation work and an N95 or better for dusty jobs.
Hearing and noise
Select ear protection by Noise Reduction Rating (NRR). Most drills and saws run 85–100 dB; pick muffs or plugs that reduce exposure below 85 dB for longer tasks. Fit must seal—test with a loud beep or phone call.
Ladders, cords, and ventilation
- Maintain three points of contact on ladders and keep feet on stable ground when clearing gutters or installing guards.
- Use outdoor extension cords rated for damp conditions and plug into GFCI outlets to cut shock risk.
- When painting, caulking, or solvent use, run fans to create a steady airflow line away from occupants and sleeping areas.
Dust, chemicals, and utility safety
Control dust when cutting composite trim: contain the work area, run a HEPA‑filtered shop vac, and wipe surfaces after. Label chemical containers clearly and store flammables in a cool, ventilated cabinet away from ignition sources.
Inspections and emergency plan
Inspect tools and replace worn blades, bits, and cords to prevent kickback. Before digging, order a utility locate and shut off gas or electrical feeds for mechanical work.
- Emergency checklist: first‑aid kit location, eye‑wash routine, and a clear stop‑work rule for anything unsafe.
Practical note: A brief safety brief before each shift keeps crews alert and cuts incidents. Treat safety like part of the job plan, not an afterthought.
Energy Efficiency and Comfort
Distinguish conductive heat loss from air leakage to target the fixes that yield the most savings. Conductive loss flows through assemblies—walls, roof, and floors—while air leakage moves heat quickly through gaps and penetrations. Seal pathways first so added insulation performs as intended.
Heat loss vs. air leakage
Use a smoke pencil around trim, electrical boxes, and attic hatches to spot drafts. When smoke drifts, mark the spot and prioritize sealing there before topping insulation.
Materials: use low-expansion spray foam for irregular voids; silicone or polyurethane caulk for gaps under 1/4″; and backer rod plus polyurethane for wide joints.
Attic ventilation (soffit/ridge)
Balanced intake at the soffits with ridge exhaust reduces moisture buildup and keeps sheathing dry. Install baffles to keep soffit vents clear of insulation and fasten with corrosion-resistant staples or a few screws through the flange.
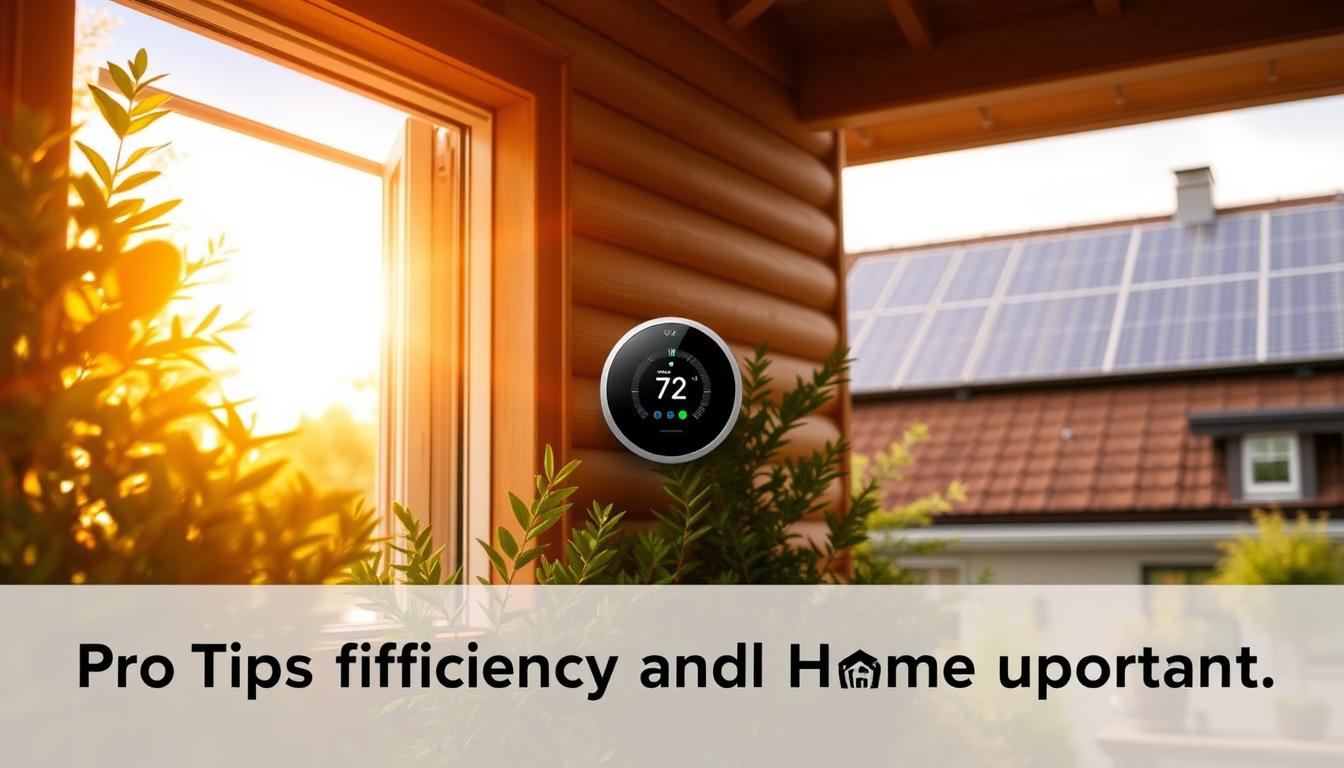
ENERGY STAR ratings and thermostat strategy
Look for ENERGY STAR labels on windows, doors, and smart thermostats to confirm tested performance. Place sensors away from drafts and sunlight, and use modest setbacks to avoid short-cycling.
| Climate Zone | Target Attic R-value | Quick Check |
|---|---|---|
| 1–3 (mild) | R30–R49 | Measure depth of loose-fill; compare to chart |
| 4–6 (mixed) | R49–R60 | Check attic hatch, rim joist, and eave baffles |
| 7–8 (cold) | R60+ | Thermal image or probe to confirm coverage |
Document improvements with before/after thermal images and note thermostat schedules, fan runtimes, and sealant types. Run bath and kitchen fans during the season and seal vent penetrations to reduce moisture risks. These simple steps make each upgrade measurable and ready for the next series of projects.
Exterior Fall Fixes and Curb Appeal
Small fall fixes around the property protect structure and sharpen curb appeal for the season. A few quick checks and simple repairs make a visible difference before guests arrive and the weather turns.

Roof inspection and flashing
From the ground, use binoculars to scan for lifted shingles, missing granules, and gaps in flashing. Focus on valleys, chimney bases, and skylight perimeters.
Note: sealant is a short-term patch; proper step flashing at sidewalls and chimneys is the durable solution. Mark any touch-ups with the date so you can re-check in spring.
Driveway crack sealant and expansion joints
Clean cracks with a stiff brush or blower, let them dry, then fill with a viscosity-appropriate sealant. Follow manufacturer cure times before vehicle loads to avoid tracking and failure.
Inspect expansion joints and refill where needed to stop water intrusion and freeze/thaw popping later in the season.
Gutters, drip edge, landscaping, and curb appeal
Check gutter apron and drip edge to protect fascia and reduce staining that harms curb appeal. Trim shrubs and mulch back two to three feet from siding and roof edges to promote drying and limit pest bridges.
A quick exterior wash of entry areas, windows, and fixtures brightens the facade and makes a good impression on a friendly neighbor or arriving guests.
Tools, limits, and when to call a pro
- Basic kit: stiff brush, leaf blower, ladder stabilizers, caulk gun, and exterior-rated sealant.
- DIY: small flashing fixes and isolated shingle repairs are reasonable for confident do-it-yourselfers.
- Call a roofer when you find soft decking, widespread shingle failure, or obvious structural rot.
Record dates on sealed cracks and flashing repairs. That simple habit turns quick fixes into a reliable maintenance set for future seasons and helps track long-term improvement.
Interior Refresh Before Winter
A few strategic interior updates keep entryways drier, paint jobs cleaner, and floors scratch-free through the season.
Weather-ready flooring considerations
Compare LVP, tile, and sealed hardwood for wet entry zones. LVP resists water and holds slip-resistant textures well. Tile sheds moisture but can feel cold. Sealed hardwood looks warm but needs tighter maintenance and correct expansion gaps for dry winter air.
- Slip resistance: choose textured finishes or small-format tile for wet areas.
- Expansion gaps: leave manufacturer-recommended space so boards can move in low-humidity months.
- Protective elements: walk-off mats and boot trays trap grit and water, extending finish life.
Low-VOC paints and surface prep
Pick low-VOC primer and paint so rooms can be sealed up with minimal odor. For cool interiors, select products rated for lower cure temperatures.
- Prep: degrease, degloss or scuff, patch, and prime.
- Sequence: ceilings first, then walls, then trim—keep a wet edge to avoid lap lines.
- Caulk trim gaps before painting for a polished look and better draft control at baseboards and casings.
Label cans with room, color, sheen, and date for future touch-ups. Swap entry levers or cabinet pulls for quick visual upgrades. Plan rooms in rotation to manage odors and cure times, and keep a small kit ready: rollers, angled brush, tray liners, tape, spackle, and a sanding sponge.
Media & Culture Glossary: The Sitcom “Home Improvement”
This brief glossary links the show’s workshop humor to practical tool language so readers can spot references and learn useful terms in a cultural context.
Show overview
Home Improvement is an American sitcom television series starring Tim Allen that ran on ABC from 1991 to 1999. The run spans eight seasons and 204 episodes.
The series was created by Carmen Finestra, David McFadzean, and Matt Williams under Wind Dancer Productions and Touchstone Television.
Tool Time: the meta-program
Tool Time is the show-within-a-show that parodies DIY segments. It pairs Tim Allen’s on-screen persona with co-host Al Borland (Richard Karn) and rotating assistants, first Lisa, later Heidi.
Binford Tools and the catchphrase
Binford Tools is the fictional sponsor used for jokes and branded props. The catchphrase “More power!” punctuated exaggerated upgrades and on-set mishaps, shaping the series’ comic manner.
Legacy and context
The sitcom helped launch Tim Allen’s career and became a top-rated series in the 1990s. Episodes often opened cold on a gag before moving to family beats.
Light syndication means Tool Time clips remain familiar in reruns. Use this media glossary alongside the technical entries to bridge screen language and shop practice.
| Years | Seasons | Episodes |
|---|---|---|
| 1991–1999 | 8 | 204 |
| Creators | Carmen Finestra; David McFadzean; Matt Williams | |
| Notable cast | Tim Allen; Richard Karn; Jonathan Taylor Thomas |
Notable Characters and Cast Names (Series References)
Meet the people who gave the show its blend of shop humor and family warmth. Below are compact profiles of the main cast and the character roles that shaped the series’ two settings: the Taylor family scenes and the Tool Time workshop.
Tim Allen as Tim Taylor
Tim Allen anchors the show as Tim Taylor, the boisterous host whose on-screen persona drove many comic beats.
Patricia Richardson as Jill (wife Jill)
Patricia Richardson plays Jill, the steady counterpoint to Tim’s antics and a grounding force in family plots.
Earl Hindman as Wilson Wilson (neighbor)
Wilson offers sage advice from behind a partly obscured fence. The hidden-face gag became an iconic character trait.
Richard Karn as Al Borland (assistant/co-host)
Richard Karn is the reliable foil and co-host on Tool Time, evolving from recurring to core cast status.
Tool Time assistants and the Taylor family
Debbe Dunning (Heidi) and Pamela Anderson (Lisa) served as on-set assistants during different stretches of the series.
The Taylor family trio includes Zachery Ty Bryan (Brad), Jonathan Taylor Thomas (Randy), and Taran Noah Smith (Mark), each filling a distinct sibling role that viewers recognized across many episodes.
| Actor | Character | Role Notes |
|---|---|---|
| Tim Allen | Tim Taylor | Lead; comedic shop host |
| Patricia Richardson | Jill Taylor | Spouse; voice of reason |
| Earl Hindman | Wilson Wilson | Neighbor; famous face gag |
| Richard Karn | Al Borland | Assistant; Tool Time co-host |
Episodes, Seasons, Syndication, and Home Media
Tracking season counts and episode numbers makes marathon viewing and collecting easier. The series aired on ABC from September 17, 1991, to May 25, 1999. It ran eight seasons with 204 episodes, each about 22 minutes long.
Broadcast and syndication path
The show entered U.S. syndication in 1995 via Buena Vista Television. Cable reruns later appeared on TBS and WGN America (from 2002) and moved through Nick at Nite, TV Land, ABC Family, the Hallmark Channel, and UPtv. Syndication sometimes shuffled episode order, so continuity can differ from original airings.
Home media and streaming
Buena Vista Home Entertainment released all eight seasons on DVD (Regions 1, 2, 4). A 25-disc “Home Improvement: 20th Anniversary Complete Collection” shipped in Region 1 on May 10, 2011. The series became available on Netflix on February 1, 2025.
Viewing notes
Tool Time segments anchor many episodes and balance workshop comedy with family plots. Cast shifts—assistants moving from Lisa to Heidi—appear across seasons and affect episode appearances by Tim Allen, Richard Karn, Jonathan Taylor Thomas, and Taran Noah Smith.
| Seasons | Episodes | Original air |
|---|---|---|
| 8 | 204 | 1991–1999 (ABC) |
| Typical runtime | ~22 minutes per episode | |
| Home release | Individual season DVDs; 25-disc complete collection |
Production, Crew, and Behind-the-Scenes Terms
A reliable taping routine and skilled crew shaped the show’s timing and comic beats. The production team set creative direction and kept episodes on schedule for broadcast.
Executive producers vs. producers
Executive producers steered the creative arc and long-term choices. Carmen Finestra, David McFadzean, and Matt Williams led the series across all seasons.
Producers handled day-to-day logistics and taping cadence. Gayle S. Maffeo worked the entire run; John Pasquin guided seasons 1–2; Alan Padula joined in seasons 4–8.
Key production credits and companies
- Additional executive contributors: Bob Bendetson (3–5), Elliot Shoenman (3–8), Bruce Ferber (mid‑4–8), Charlie Hauck (6–7), and Tim Allen (6–8).
- Produced by Wind Dancer Productions and Touchstone Television, emblematic of 1990s studio television.
Studio format and practical terms
The series was filmed at Walt Disney Studios in Burbank on videotape with a multi-camera set and live audience. That format drove pacing, rehearsal, and a 22-minute running time typical for network comedy blocks.
| Item | Note | Seasons |
|---|---|---|
| Executive leads | Finestra, McFadzean, Williams | All |
| Producer continuity | Gayle S. Maffeo; Padula; Pasquin | Varied |
| Studio | Walt Disney Studios, Burbank | All |
Fans often spot how set design, multi-camera blocking, and taping schedules shaped scenes with Al (Richard Karn) and Jill (Patricia Richardson), and how Tim Allen’s expanding off-screen role complemented his on-screen career.
Measurement, Fasteners, and Hardware Basics
Accurate measurement and the correct hardware are the backbone of any safe mounting job.
Find studs with an electronic finder for deep detection or a magnetic finder for nails. Verify with a small test hole before you commit. Typical on-center spacing is 16″ or 24″ — mark the number and run a straight reference line.
Load paths and stud fastenings
Fastening into studs routes loads to framing. For shelves, TVs, and safety-critical hardware, studs keep anchors from pulling out. If you must use anchors, pick one matched to the substrate and expected load.
Anchors, screws, and corrosion resistance
- Plastic expansion: light loads in drywall only.
- Toggle/spring: heavy loads in hollow walls.
- Sleeve anchors & masonry anchors: use for concrete or brick.
Choose wood, drywall, or structural screws and pick exterior-coated or stainless fasteners for damp or unconditioned spaces to reduce corrosion and galvanic risk. Match metals and use compatible washers.
| Fastener Type | Best Use | Tip |
|---|---|---|
| Wood screw | Framing to wood | Pilot hole to avoid split |
| Drywall anchor | Light fixtures, trim | Use toggle for heavier loads |
| Sleeve/masonry | Concrete, brick | Drill correct diameter per spec |
| Stainless/Coated screw | Exterior, damp spaces | Pre-drill and seal penetrations |
Practical checklist: mark a level line, set out a drill, awl, 2-foot level, laser line, stud finder, and tape measure. Check hardware pack contents, confirm lengths and diameters, use clutch torque to seat heads, and seal exterior holes when done.
Conclusion
Close the season with a clear plan: use these entries to stage, prioritize, and complete targeted fall tasks that deliver quick comfort and protection before winter.
Start with the building envelope—air sealing, insulation top‑offs, and weatherization—then add HVAC checks, drainage, and interior finishes in that order. Sequence work, document results with photos and receipts, and log measurements so each fall builds on the last.
Keep safety simple: correct PPE, tested tools, and a pause when something feels unsafe will prevent injuries and costly fixes.
As a cultural note: the sitcom’s workshop humor and the Tool Time segments can spark a can‑do attitude while you learn practical skills. That light touch makes the series feel useful and friendly, not just entertaining.
Finish with a short audit at the end of each project. Small steps now compound into bigger gains by the end of winter. The right prep at the right time is the cornerstone of efficient, confident home improvement work.
FAQ
What are the top fall upgrade priorities for the season?
Focus on weatherization tasks first: air sealing, attic insulation, and a furnace tune-up. Add gutter guards, downspout extensions, and door sweeps to prevent water and drafts. These moves improve comfort and cut heating costs as temperatures drop.
How do I use the glossary overview to plan projects?
Treat the glossary as a quick reference: look up key terms like R-value, air sealing, and ENERGY STAR ratings to understand performance goals. Match terms to tasks on your checklist to set materials, tools, and permit needs before work begins.
What is R-value and why does it matter for autumn projects?
R-value measures insulation’s resistance to heat flow. Higher R-values slow heat loss and reduce furnace runtime. For cold months, verify attic and wall R-values and add insulation where recommended for your climate zone.
When should I schedule a furnace tune-up?
Schedule a professional tune-up in early fall before heavy use. A check should include combustion efficiency, filter replacement, thermostat calibration, and safety tests to ensure reliable, efficient operation all season.
What’s the difference between an impact driver and a drill/driver?
A drill/driver handles drilling and light fastening with adjustable clutch control. An impact driver delivers high torque for long screws and lag bolts with less stripping. Keep both in your kit for framing, decking, and trim work.
Which caulk type is best for exterior fall sealing?
Choose exterior-grade silicone or polyurethane caulk for joints exposed to moisture and temperature swings. Silicone stays flexible and resists mildew, while polyurethane bonds well to wood and masonry for durable seals.
Do I need permits for typical seasonal upgrades?
Simple tasks like weatherstripping, adding insulation, or installing programmable thermostats usually don’t require permits. Structural changes, major electrical or HVAC work often do. Check local building department rules before starting.
What personal protective equipment (PPE) is essential?
At minimum, use safety glasses, hearing protection when running power tools, and work gloves. For insulation or chemical applications, add a dust mask or respirator and long sleeves to protect skin and lungs.
How does attic ventilation affect winter comfort?
Proper soffit and ridge ventilation prevents moisture buildup and ice dams by balancing airflow. Good ventilation plus adequate insulation keeps roof assemblies dry and reduces heat loss that causes ice formation.
What exterior fixes improve curb appeal before winter?
Inspect roof flashing and shingles, seal driveway cracks, clean gutters, and refresh exterior trim with composite or rot-resistant materials. These repairs protect structure and maintain appearance during harsh weather.
Which flooring choices are weather-ready for the closed-window season?
Choose stable materials like engineered hardwood or luxury vinyl that tolerate seasonal humidity changes. Add area rugs and proper underlayment to maintain comfort and protect subfloors when indoor air dries.
What is Tool Time and why is it relevant to DIY culture?
Tool Time was the show-within-a-show on the sitcom that popularized DIY humor and tool talk. It highlighted common power tools, safety habits, and the “more power!” catchphrase—cultural touchstones for many DIYers.
Who were the main cast members associated with the series references?
Key cast included Tim Allen as Tim Taylor, Patricia Richardson as Jill Taylor, Richard Karn as Al Borland, Earl Hindman as Wilson Wilson, Jonathan Taylor Thomas as Randy, Taran Noah Smith as Mark, and Zachery Ty Bryan as Brad.
Where can I find episodes and collections for syndication or DVD?
The sitcom aired on ABC and later ran in syndication on networks like TBS, TV Land, and Nick at Nite. Complete series DVD collections and streaming availability vary by region—check retailers and streaming platforms for current offerings.
Who produced the series and where was it filmed?
Executive producers included Carmen Finestra, David McFadzean, and Matt Williams. Production companies involved Wind Dancer Productions and Touchstone Television, with filming at Walt Disney Studios in Burbank on a multi-camera set.
What measurement and fastener basics should I master for seasonal projects?
Learn stud spacing and on-center measurements, choose corrosion-resistant screws for exterior use, and pick anchors sized to load and substrate. Accurate layout and the right fasteners prevent failures and rework.