
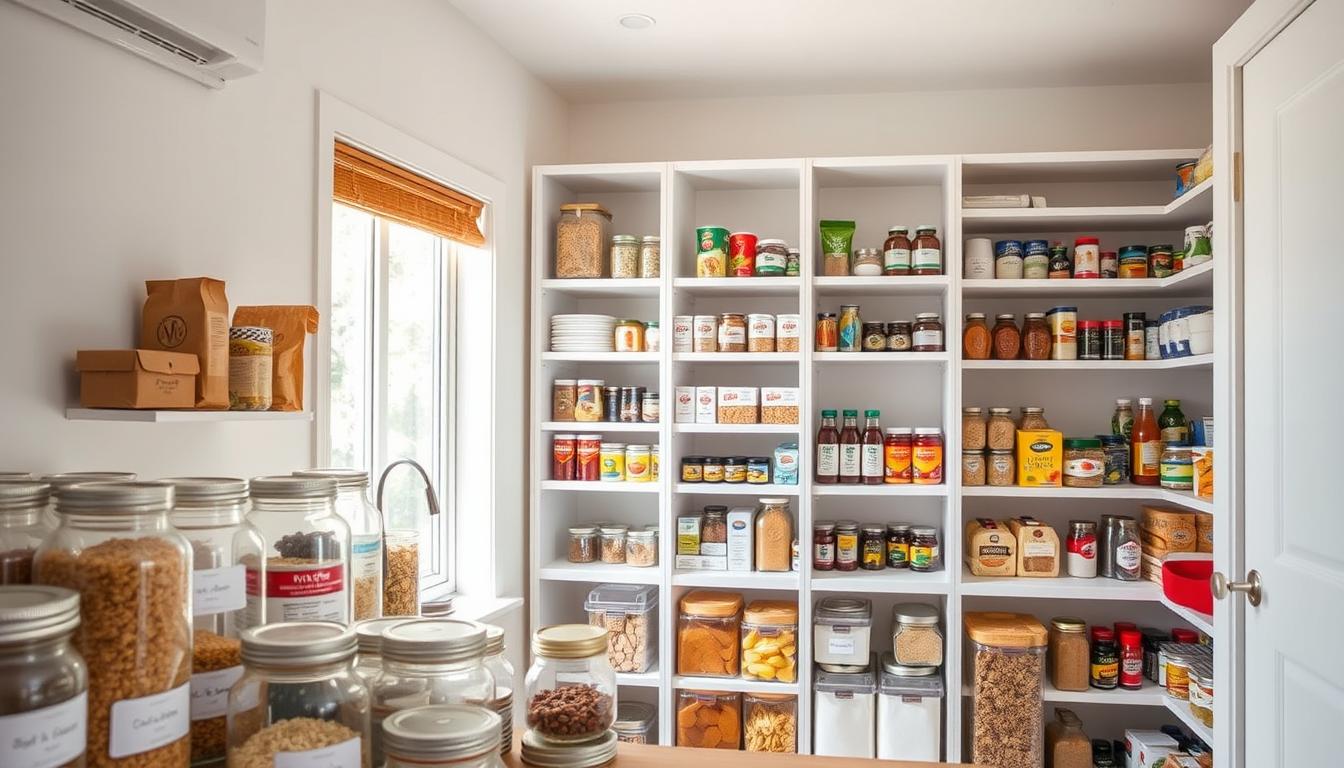
A cluttered pantry can be a source of frustration in the kitchen, leading to wasted time and food. Decluttering your pantry is a simple process that can greatly improve your kitchen’s efficiency and overall organization.
By decluttering your pantry, you can reduce food waste, save time searching for ingredients, and create a more enjoyable cooking experience. Our guide will walk you through four simple steps to achieve a more organized kitchen.
Key Takeaways
- Simplify your pantry’s contents for easier meal planning
- Improve kitchen efficiency by reducing clutter
- Save time searching for ingredients
- Reduce food waste by organizing your pantry
- Create a more enjoyable cooking experience
The Hidden Costs of a Cluttered Pantry
A cluttered pantry is more than just an eyesore; it can have significant financial and practical implications. The chaos within can lead to a series of issues that affect not just your kitchen’s organization but also your wallet and time.
Wasted Food and Money
One of the most direct consequences of a cluttered pantry is the potential for wasted food. When items are buried or forgotten, they often expire or spoil, leading to unnecessary purchases and waste. This not only impacts your grocery bill but also contributes to food waste, a significant environmental issue.
Time Lost Searching for Ingredients
A cluttered pantry can significantly hamper your ability to prepare meals efficiently. Time management in the kitchen becomes a challenge when you can’t find what you need. The minutes spent searching for a specific ingredient can add up, making cooking a more frustrating experience than it needs to be.
Reduced Kitchen Efficiency
The overall kitchen efficiency is also compromised with a cluttered pantry. When your storage spaces are disorganized, it affects your workflow, making meal preparation slower and more laborious. By organizing your pantry, you can streamline your cooking process, making it more enjoyable and less time-consuming.
By understanding these hidden costs, you can take the first step towards creating a more organized, efficient, and cost-effective kitchen space.
Signs Your Pantry Needs Decluttering
Recognizing the signs of a cluttered pantry is the first step towards a more organized kitchen. A cluttered pantry can be a source of frustration and inefficiency, but identifying the key indicators can help you tackle the problem.
Expired Products Taking Up Space
One of the most obvious signs that your pantry needs decluttering is the presence of expired or near-expired products. These items not only take up valuable space but can also be a health risk if consumed past their expiration dates. Regularly checking the expiration dates of your pantry staples is crucial.
Difficulty Finding What You Need
If you find yourself spending too much time searching for ingredients or supplies in your pantry, it’s a clear sign that your storage system is failing. An organized pantry should make it easy to locate what you need quickly.
Disorganized Shelving and Storage
Disorganized shelving and storage solutions can significantly contribute to a cluttered pantry. When shelves are overcrowded and storage containers are not labeled or are inadequate, it can lead to a chaotic pantry environment. Implementing effective storage solutions can greatly improve the functionality of your pantry.
By recognizing these signs and taking action, you can transform your pantry into a well-organized space that enhances your cooking experience and reduces waste.
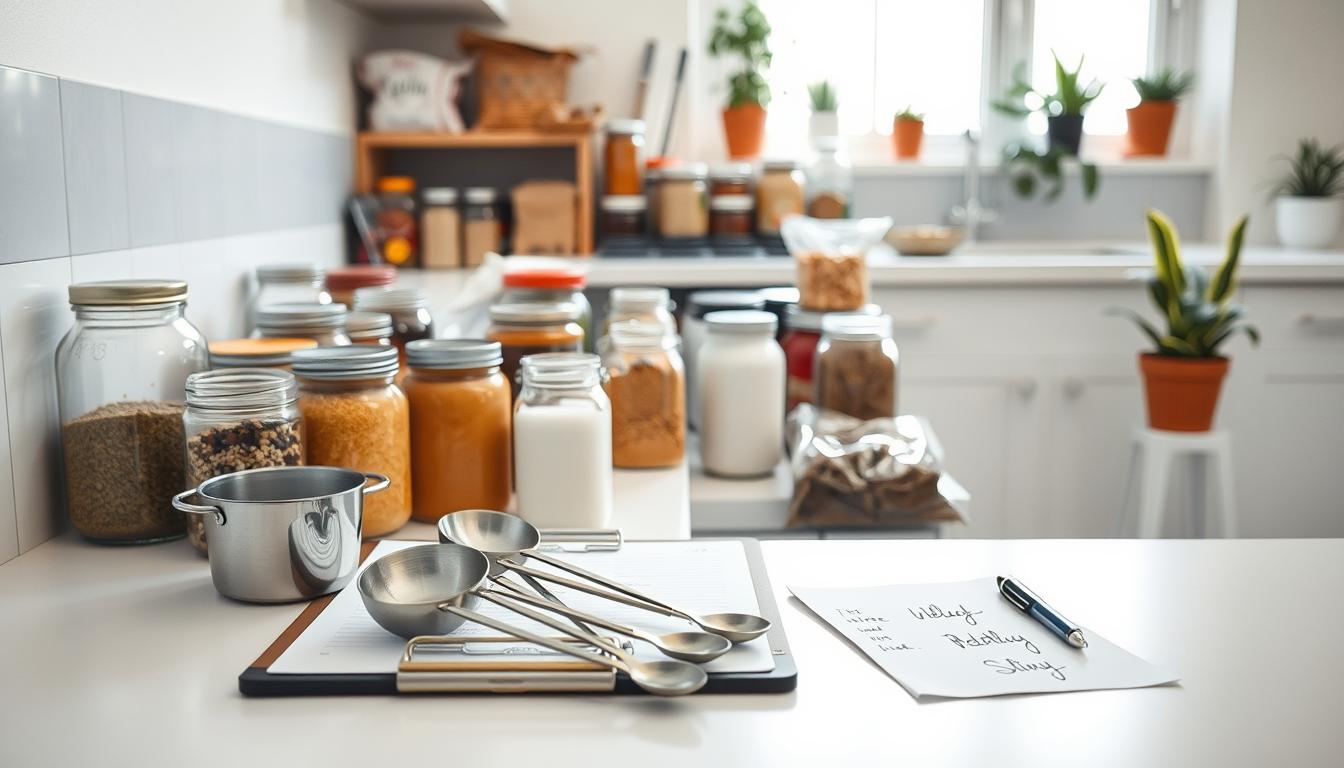
Essential Tools for Pantry Organization
A well-organized pantry requires a thoughtful selection of storage and cleaning tools. Having the right supplies on hand makes the process more efficient and helps maintain the space over time.
Storage Containers and Labels
Investing in storage containers is crucial for keeping pantry items fresh and organized. Choose containers that are airtight and made from durable materials. Labels are also essential for identifying contents and expiration dates. Consider using a label maker for a uniform look.
- Airtight containers for grains and snacks
- Clear containers for visibility
- Label maker for easy identification

Shelf Liners and Organizers
Shelf liners protect your pantry shelves from spills and make cleaning easier. They come in various materials, including polycrylic waterproof options. Shelf organizers, such as baskets and dividers, help maximize storage space and keep items categorized.
- Polycrylic waterproof shelf liners
- Baskets for storing small items
- Dividers for separating categories
Cleaning Supplies You’ll Need
Before organizing, it’s essential to clean your pantry thoroughly. Gather cleaning supplies like a gentle cleanser, a scrub brush, and a microfiber cloth. This will help remove dust, dirt, and any expired or spoiled food residue.
- Gentle cleanser for surfaces
- Scrub brush for tough stains
- Microfiber cloth for dusting
Preparation: Setting Yourself Up for Success
To achieve a clutter-free pantry, you need to set yourself up for success. This involves several key steps that will make the decluttering process smoother and more efficient.
Scheduling Time for Your Pantry Project
The first step is to schedule a specific time for your pantry project. Set aside a dedicated block of time when you can focus on decluttering without interruptions. This will help you stay on track and ensure that the task is completed efficiently.
Consider your daily routine and choose a time slot that works best for you. Whether it’s a weekend afternoon or a few hours after work, having a clear schedule will help you stay committed to your project.
Creating a Sorting System
Developing a sorting system is crucial for effective pantry decluttering. Start by categorizing your pantry items into groups, such as grains, canned goods, and baking supplies. This will make it easier to decide what to keep, toss, or donate.
| Category | Items to Keep | Items to Toss | Items to Donate |
|---|---|---|---|
| Grains | Pasta, rice, oats | Expired or stale items | Unopened, non-perishable items |
| Canned Goods | Unopened, within expiration dates | Expired or dented cans | Unopened, non-perishable items |
Setting Clear Goals for Your Space
Setting clear goals for your pantry space is essential to achieving the desired outcome. Define what you want your pantry to look like and how you want it to function. Consider factors such as accessibility, storage, and aesthetics.

By having clear goals, you’ll be able to make decisions that align with your vision and create a pantry that is both functional and enjoyable to use.
Step 1: Empty and Assess Your Pantry Space
A clutter-free pantry starts with a comprehensive assessment, which begins by taking out all the contents. This initial step is crucial as it allows you to understand what you’re working with, identify expired or unused items, and plan your organization strategy.
Removing All Items Systematically
Begin by systematically removing all items from your pantry. Take out every can, jar, and package, and place them on a counter or table. This process can be overwhelming, but it’s essential to see everything you’re working with. As you remove items, start to categorize them into broad groups, such as grains, canned goods, and baking supplies.
Checking Expiration Dates
Once everything is out, start checking expiration dates. Discard any expired or spoiled food to make space for what’s still good. This step is vital in ensuring your pantry is not only organized but also safe and healthy.
Wiping Down Shelves and Surfaces
With the pantry empty, it’s the perfect time to clean the shelves and surfaces. Use a damp cloth to wipe down every area, removing dust, dirt, and any spills. This not only improves the appearance of your pantry but also helps prevent pests and maintains hygiene.
Dealing with Stubborn Stains
For stubborn stains, mix baking soda and water to create a paste. Apply this paste to the stain, let it sit for a few minutes, and then scrub it off. This method is effective for removing tough stains without using harsh chemicals.
Preventing Future Spills
To prevent future spills, consider using shelf liners or non-slip mats. These can catch any drips or spills, making cleanup easier and protecting your shelves from damage.
| Cleaning Task | Frequency | Method |
|---|---|---|
| Wipe down shelves | Monthly | Damp cloth |
| Deep clean stains | Quarterly | Baking soda paste |
| Check expiration dates | Every 3 months | Visual inspection |
By following these steps, you’ll be well on your way to a decluttered and organized pantry. Remember, maintaining your pantry is an ongoing process that requires regular checks and adjustments.
Step 2: Sort and Categorize Your Pantry Items
Sorting and categorizing your pantry items is a crucial step in decluttering your kitchen. This process helps you decide what to keep, what to discard, and how to organize your remaining items effectively.
Creating Logical Food Categories
To start, create logical categories for your pantry items. Common categories include grains, canned goods, baking supplies, and snacks. You can also categorize items by type, such as breakfast foods, cooking essentials, or international cuisine. Categorizing your items makes it easier to see what you have and helps in planning meals and grocery shopping.
- Grains (rice, pasta, cereals)
- Canned goods (vegetables, fruits, meats)
- Baking supplies (flour, sugar, baking powder)
- Snacks (nuts, dried fruits, crackers)
The Keep, Toss, Donate Method
As you sort through your pantry items, use the keep, toss, donate method to decide what to do with each item. Keep items that are fresh, useful, and in good condition. Toss expired, spoiled, or damaged items. Consider donating unopened, non-perishable items to local food banks or shelters.
Consolidating Duplicate Items
Consolidating duplicate items can help reduce clutter and make your pantry more efficient. For example, if you have multiple containers of the same spice, consider consolidating them into one container. This also applies to bulk purchases.
Managing Bulk Purchases
Bulk purchases can be cost-effective, but they can also lead to clutter if not managed properly. Store bulk items in airtight containers to maintain freshness and keep them organized. Consider dividing large quantities into smaller portions for easier use.
Handling Specialty Ingredients
Specialty ingredients, such as exotic spices or unique condiments, can be tricky to manage. Store them in labeled containers and keep them in accessible locations. If you haven’t used an item in a year, consider whether it’s worth keeping.

By sorting and categorizing your pantry items effectively, you’ll be able to maintain a clutter-free and functional kitchen space. This step is crucial for achieving your pantry organization goals.
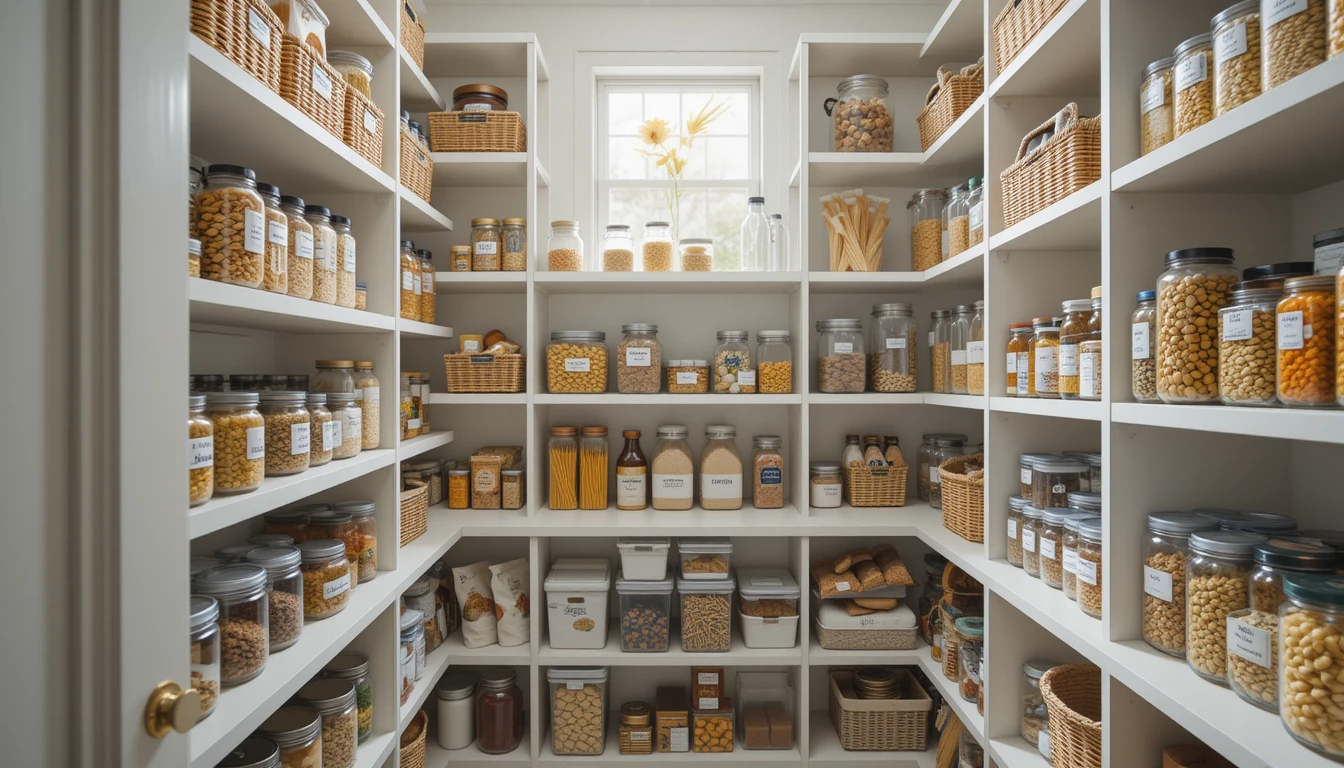
Step 3: Organize and Arrange for Maximum Efficiency
Now that you’ve sorted and categorized your pantry items, it’s time to organize and arrange them for maximum efficiency. This step is crucial in ensuring that your pantry remains clutter-free and functional.
Strategic Placement of Frequently Used Items
Place your most frequently used items in easy-to-reach locations. This could be at eye level or near the front of your pantry. By doing so, you’ll save time when cooking and reduce the strain on your back and knees.
Implementing Storage Solutions
Invest in good quality storage containers and labels. These will help keep your pantry items fresh and make it easier to identify what’s inside each container. Consider using stackable containers to maximize your shelf space.

Creating a Functional Layout
A well-planned layout is essential for a functional pantry. Consider the workflow in your kitchen and plan your pantry accordingly.
Zone Organization Techniques
Divide your pantry into zones based on the types of items you store. For example, you could have a baking zone, a snack zone, and a cooking essentials zone. This makes it easier to find what you need when you need it.
Visibility and Accessibility Tips
Ensure that all items are visible and easily accessible. Use shelf liners and organizers to keep your shelves clean and tidy. Consider installing pull-out shelves or baskets for hard-to-reach areas.
By implementing these strategies, you’ll create a pantry that is not only organized but also efficient and enjoyable to use.
Step 4: Maintain Your Pantry with Regular Cleaning Routines
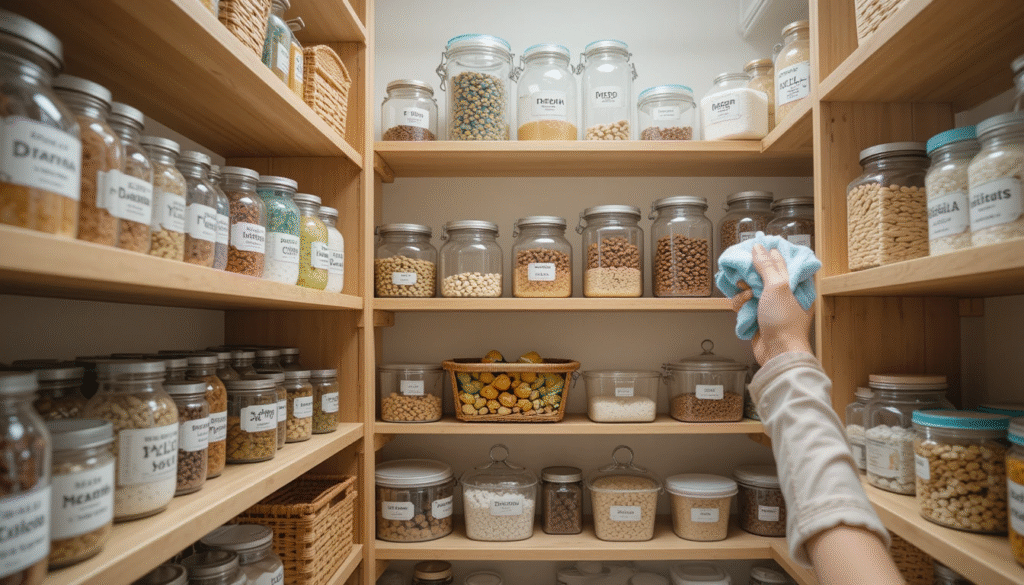
A clutter-free pantry is not a one-time achievement but a continuous process. Maintaining your pantry requires consistent effort and regular cleaning routines to ensure it remains organized and functional.
Weekly Maintenance Schedules
Establishing a weekly maintenance schedule is crucial for keeping your pantry clutter-free. Set aside a few minutes each week to tidy up the space, checking for expired or spoiled food items and wiping down surfaces.
Quarterly Deep Cleaning Tasks
In addition to weekly maintenance, schedule quarterly deep cleaning tasks. This involves thoroughly cleaning the pantry, including dusting shelves, cleaning containers, and checking for signs of pests.
Preventing Clutter Buildup
Preventing clutter buildup is essential for maintaining your pantry. Implement strategies such as the “first in, first out” rule for food items and regularly reviewing your inventory to avoid overbuying.
Family Involvement Strategies
Involving your family in pantry maintenance can make the task more manageable and teach valuable organizational skills. Assign tasks to family members, such as checking expiration dates or wiping down shelves.
Inventory Management Systems
Implementing an inventory management system can help you keep track of what’s in your pantry. Consider using a digital app or a simple notebook to log items and their expiration dates.
| Maintenance Task | Frequency | Responsibility |
|---|---|---|
| Tidy up pantry | Weekly | All family members |
| Deep clean pantry | Quarterly | Primary cook |
| Check expiration dates | Monthly | All family members |
By following these steps and maintaining a consistent routine, you can keep your pantry organized and clutter-free, making meal preparation more efficient and enjoyable.
Conclusion
By following the four simple steps to declutter your pantry, you’ve not only improved your kitchen organization but also contributed to a more efficient home improvement project. The process of pantry decluttering can be a transformative experience, much like nurturing a beauty star calathea plant, which requires attention to detail and care.
As you maintain your newly organized pantry, you’ll find that it’s easier to navigate, just like avoiding tall weeds with white flowers on top that can clutter your garden. The standard kitchen sink cabinet size can also be optimized for better storage, making meal preparation a breeze.
By applying the principles outlined in this article, you can extend your decluttering efforts to other areas of your home, creating a more streamlined and peaceful living space. With regular cleaning routines and a commitment to maintaining your space, you’ll enjoy the benefits of your hard work for years to come.
FAQ
What are the benefits of decluttering my pantry?
Decluttering your pantry can help reduce food waste, improve kitchen efficiency, and save you time searching for ingredients.
How often should I clean my pantry?
It’s recommended to perform weekly maintenance tasks and quarterly deep cleaning to keep your pantry organized and clutter-free.
What are some essential tools for pantry organization?
Storage containers, labels, shelf liners, and cleaning supplies are some of the essential tools you’ll need to effectively organize your pantry.
How do I manage bulk purchases in my pantry?
To manage bulk purchases, consider consolidating duplicate items, using storage containers, and implementing an inventory management system.
What is the best way to prevent clutter buildup in my pantry?
To prevent clutter buildup, establish a regular cleaning routine, involve your family in maintenance, and use storage solutions effectively.
Can I use polycrylic to protect my pantry shelves?
Polycrylic is a water-based coating that can be used to protect your pantry shelves from spills and stains, but it’s not entirely waterproof.
How can I keep my pantry pest-free?
To keep your pantry pest-free, store food in sealed containers, clean up crumbs and spills promptly, and check for signs of pests regularly.
What is the ideal size for a kitchen sink base cabinet?
The standard size for a kitchen sink base cabinet varies, but it’s typically between 30-36 inches wide.
How can I improve the lighting in my pantry?
Consider using LED lighting, which is energy-efficient and can be installed under shelves or inside cabinets to improve visibility.